 I have to confess that I’m a “Craft-a-holic”. I enjoy using the in-game crafting system a great deal and I spend a lot of time gathering resources and manufacturing items for my own characters, my Kin, and the auction house.
When I started, I used the 4 character method describes in the Lotro Wiki article on Crafter Interdependence. It states that you could cover all crafting by using only four characters and the vocations; Historian, Tinker, Armourer Woodsman. While this is true, it does not allow you to have a craftsman as a member of each guild. For that, you need 7 characters. The diagram to the right shows the relationship between the 7 different characters and can be enlarged by clicking on it.
The central roles in this method is the Explorer vocation. The Explorer should be your highest level character and his mission is to gather the crafting mats for all other characters on his travels. This is the only character that you really need to level up in order to safely acquire the ore, wood and hides from the higher level regions. The Explorer funnels all Base Metals to the Armsman and Armoruer. He sends all Wood to the Woodsman, and all Precious Metals go to the Tinker. Any Scholar Items found along the way goes to the Historian and all Hides he keeps for his role as Tailor
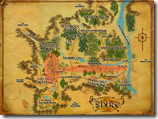
The next member of the team is the Yeoman. This gentleman farmer/chef forms a small craft economy all on his own. You never have to advance him past completing the introduction and he never has to leave the Shire is you don’t want him to. The Guild, Superior Ovens, and Superior Farmland are all close by. This character is self contained, producing all the mats required by farming in order to produce culinary delights. He can easily reach Westfold level and Master of the Cooking Guild. It’s only a matter of time.
The remaining vocations; Armsman, Armourer, Historian, Tinker, Woodsman are utilized only for their primary crafting skills. As you already have a cook and a tailor in your first two characters, these remaining five should fill the roles of Weaponsmith, Metalsmith, Scholar, Jeweller and Woodworker respectively. If they have a “gathering’ profession such as Prospector or Forester you can engage in these activities if you want to. No development should be made in their other crafting professions that are not guild related.
One of the main questions to answer is whether to level the crafting alts or not. You don’t have to. Every crafting character can be left as a low level alt and still churn out their wares, but there are some considerations. For the Scholar you have to consider that while mats drop from mobs along the way, it is faster if the scholar harvests his own materials from the various nodes. Also to get to the scholar’s Guild one must get to Rivendell. At lower levels this can be a challenge. Likewise, but less strenuous, the Tinker and the Woodworker both need to get to Esteldín for their guilds, so some levelling might be in order for them.
At higher tiers, you start running into gated recipes based on your reputation standing with one faction or another. If these recipes are important to you, then levelling will be required. If you are happy with the output of Improved Guild recipes, then level advancement for your alts is not as important. If you do choose to level them, then any mats they find on their travels (i.e. Hides and Scholar mats) will be funnelled to the appropriate alt.
Transfers of materials between alts is best done using Shared Storage or via a personal house’s storage chests. I find the former to be much more convenient, and recommend it as the method you use.
So create your own “Magnificent Seven”, have each character “Guild-up” and let the crafting begin.


